Online Selection & Acquisitions
Items with a Status of On Order, but not yet arrived, are eligible for Cancel actions. The Item Detail screen will display the Cancel Notice option on the Choose a task, check appropriate items, and click red arrow drop-down. When enabled, the Print Cancel Notices permission (Order permission category) causes the display of the Orders to Cancel option in the Released Orders section of the Administration (Admin) page.
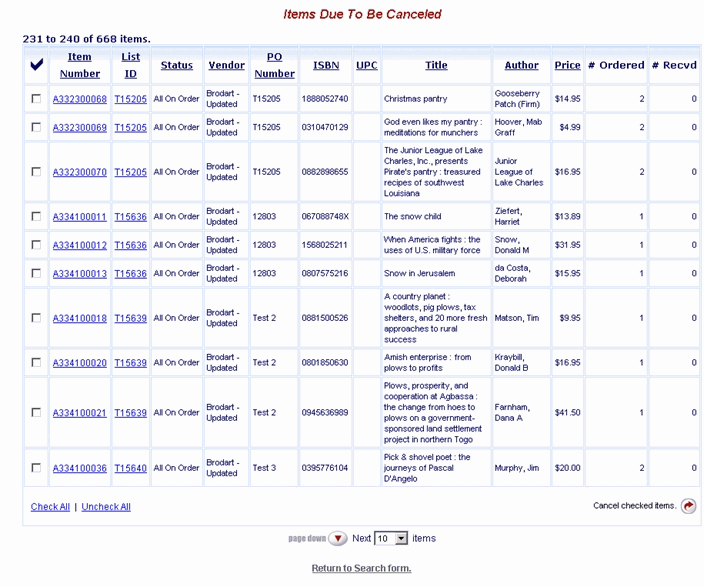
Clicking the Orders to Cancel option allows you to generate a report titled Items Due to Be Canceled. The report includes any items that have exceeded the Days to Cancel setting in the Vendor Configuration. From this report the user can select the items to be canceled and then click the Cancel Checked Items button. See: Orders to Cancel
Generate Orders to Cancel (or Re-Print / Re-Email)
Click the Admin link at the top of the OSA screen and the Administration menu displays.
Under Released Orders, click the Orders to Cancel option.
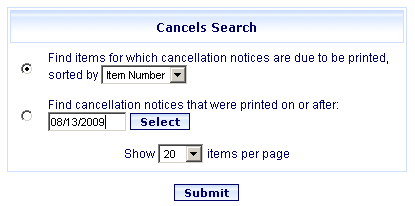
The Cancels Search dialog displays, shown below.

Click the option button for the desired search type and follow the instructions below:
Find items for which cancellation notices are due to be printed, sorted by.
Click the drop-down list and select a Sort Option. Click the drop-down list to change the number of items to display per page.
Click the Submit button. The Items Due To Be Canceled report displays.

Click the check box at the left of each Item Number you want to cancel.
Click the rotating red arrow button labeled Cancel Checked Items.
A Transmission Results message opens in a new window advising the Vendor Name and Result of the cancellation transmission. Close the Transmissions Results window.

Find cancellation notices which were printed on or after: (For Re-printing and emailing)
Type the date in mm/dd/yyyy format, or click the Select button to view a calendar. Click the drop-down list to change the number of items to display per page.
Click the Submit button. The Cancellation Notices - Reprint report displays.

For each notice you want to Reprint / email Cancellation Notices, click the appropriate check box.
When all desired items are checked, click the rotating red arrow button to the right labeled Reprint/email cancel notices for checked items.
A new window opens displaying the Claim Notices for the checked items. A Print dialog displays. Click Print. Close the Claims Notices window.