Online Selection & Acquisitions
Online Selection & Acquisitions allows the individual(s) assigned the responsibility for administering OSA, to add, update, copy, and delete user configurations, including the settings for User ID, Password, permissions, review levels, and funds. In addition a user can be blocked from logging in.
Log in to OSA with a Username granted adequate permissions to Maintain User information.
Click the Admin link and the Administration menu appears.
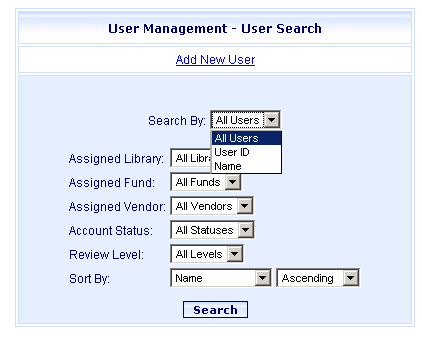
Under Acquisitions Setup, click the Users link and the User Management - User Search dialog will appear as shown below.

To add a new user, press the Add New User link. A blank User Configuration - Add New User form will display. Go to Step 4.
To copy or update a user profile you must first search for the desired profile that you want to copy or update. See: User Management - User Search. When the desired profile is displayed in the User Search Results list, in the Action column click the Copy User or Update User link as desired, as shown in the partial screen example below.

If copying an existing user profile: The User Configuration - Copy User dialog will display. The user identity specific entries on the new user's General tab will be blank. All other settings are retained from the user being copied. Type the requested user information and then go to Step 10 to exit, or see Steps 4 thru 9 if you wish to change any settings on the other tabs.
If updating a current user profile: The User Configuration - Update User dialog will display the existing settings for the selected user. Use Steps 4 thru 9 to make changes as desired, then go to Step 10.
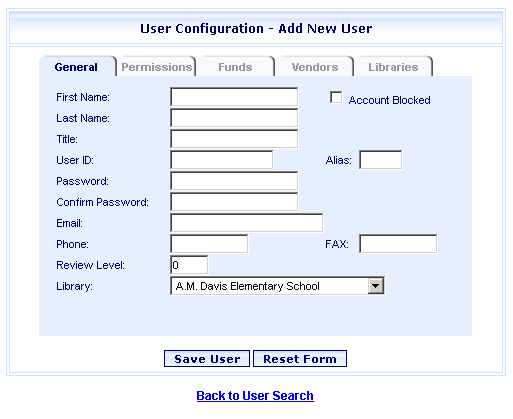
On the General tab (example below): For new users, complete the information as requested. If you are updating a user configuration, revise the existing information as desired.
Important! The Review Level setting, in conjunction with the permissions assigned to a user, determines what lists the user will be able to see on their Awaiting Review list, and what options will be available on their Navigation Toolbar. This field should be set relative to the review structure in place at your library.
If your library has only one review level (0), all users will have all available options on their List Management Navigation toolbar, and on their List Management Options drop-down list, including the Order option.
If your library has a multi-tiered structure, users with a Review Level of 0 will not see the My Review and Awaiting Review options on the List Management Navigation toolbar, and the options available on their List Management Options drop-down list will reflect the permissions assigned to them on the Permissions tab. This concept follows through all review levels.
If a list is submitted by a user with a Review Level of 0, the person wanting to review the list would be required to have a Review Level setting of 1 to see it in their Awaiting Review list.
When the Level 1 reviewer approves the list, users with a Review Level of 2 would see the list in their Awaiting Review list.
If there is a Review Level of 3 in your review structure, the Level 2 reviewer will approve the list and the Level 3 reviewer will see the list in their Awaiting Review list.
Reviewers with the highest Review Level in your library, whether it is Review Lever 0, 1,2,3 or higher, will have the Order option on their List Management Options drop-down list.
This concept applies for any review structure with more than 1 level, no matter how many levels are in place. See List Management Overview for information about all the list related functions.
Other Fields on the General tab:
Most of these fields are self explanatory. The following list explains the fields that are not.
Account Blocked - Select this check box to Block a borrower account, and clear the check box to Un-Block a user. See the Block a Borrower section later in this Help topic for more information.
Alias (Required) - A three character designation that is used for internal statistical gathering purposes for this user.
Click the Permissions tab (example below). Press the + sign to the left of each permission category to view the complete list of settings for that category.
Note: You can click Expand All to display the complete list of permissions for all categories. Click Collapse All to return to the list of categories.
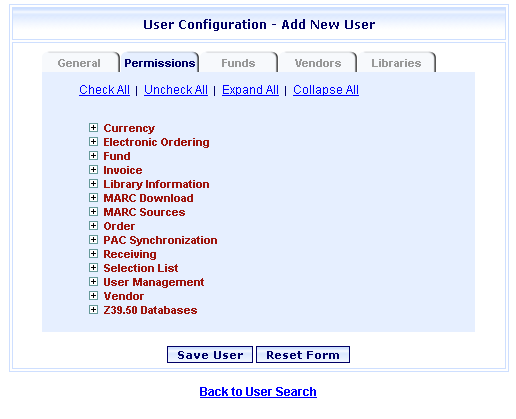
Select the appropriate permissions in each permission category for the user in question. See Review Levels and Permission Settings.
Note: You can click Check All to select all options. You can click Un-check All to de-select all selected options.
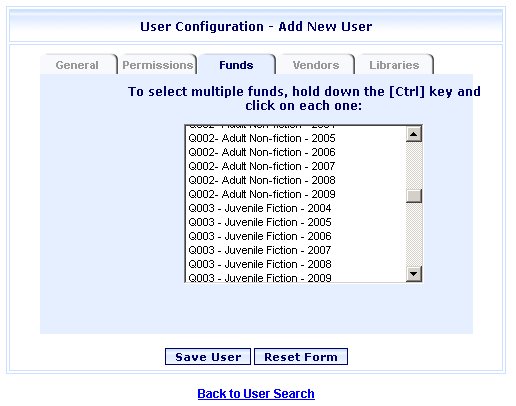
Click the Funds tab (example below). From the list, select the fund(s) to be available to this user.
Note: The funds list will not be available for those systems that select funds automatically. To select multiple vendors, press and hold the CTRL key while selecting the desired vendor names.
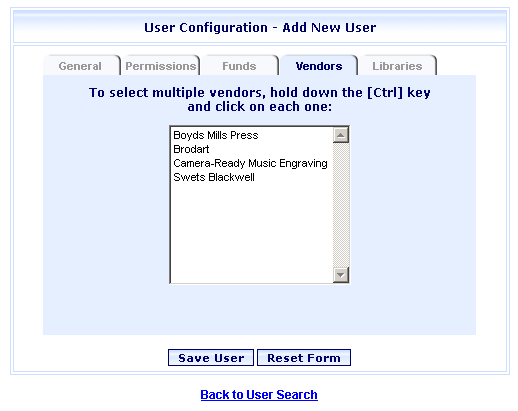
Click the Vendors tab. From the list, select the desired vendor(s) to be available to this user. To select multiple vendors, press and hold the CTRL key while selecting the desired vendor names.
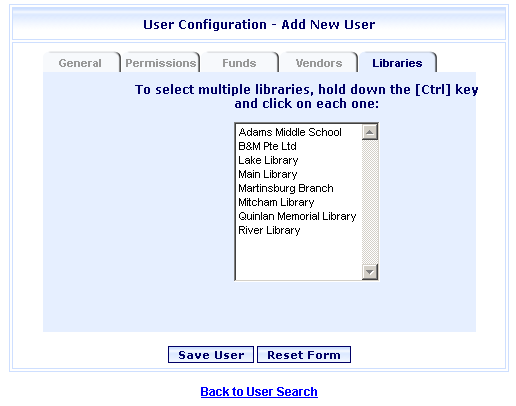
Click the Libraries tab. Select the desired library, or libraries, from the list of libraries available to this user.
When finished with these steps click Save User.
You will be advised that the user information has been saved. Click OK.
When the new user logs on and clicks My Lists, a list named User Name Txx List will have been automatically created.
Logon to OSA with a Username granted adequate permissions to Maintain Users information.
Click the Admin link and the Administration menu will appear.
Under Acquisitions Setup, click the User link and the User Management - User Search screen will appear.
You must first search for the desired User profile that you want to block. See: User Management - User Search.
When the desired User Name is shown on the User Search Results list, click the Update User link in the Action column.
The User Management - Update User dialog will display that user profile.
To Block the user, verify that this is the user you wish to block, and then click the Block User check box. A check mark will display in the box.
To Unblock the user: If the user is already blocked, a check mark will be displayed in the Block User check box. Click the check box to remove the check mark.
When done click Save User. You will be advised that the settings have been saved. Click OK.
Logon to OSA with a Username granted adequate permissions to Maintain Users information.
Click the Admin link and the Administration menu will appear.
Under Acquisitions Setup click the Users link and the User Management - User Search dialog will appear.
You must first search for the desired profile that you want to delete. See: User Management - User Search.
When the desired User Name is shown on the User Search Results list, click the Update User link in the Action column.
The User Management - Update User dialog will display that user profile.
Verify that this is the user you wish to delete, and then press the Delete User button.
You will be asked to confirm that you want to delete this user from the system. To continue, click OK, or click Cancel to terminate the action. If you click OK, a notice will appear advising the user has been deleted.